
“DIY Makeup: A Beginner’s Guide to Creating Your Own Cosmetics
Related Articles DIY Makeup: A Beginner’s Guide to Creating Your Own Cosmetics
- Affordable Fitness: Getting Fit Without Breaking The Bank
- Daily Seasonal Trends: A Comprehensive Overview
- The Enduring Allure Of Classic Outfits: Timeless Style For Every Occasion
- Chic Clothing: A Style Guide
- Affordable Eco Beauty: A Guide To Sustainable And Budget-Friendly Skincare And Makeup
Introduction
We’re thrilled to take a closer look at an engaging topic related to DIY Makeup: A Beginner’s Guide to Creating Your Own Cosmetics. Let’s weave together valuable insights and fresh perspectives to bring a new dimension to your understanding.
Table of Content
DIY Makeup: A Beginner’s Guide to Creating Your Own Cosmetics

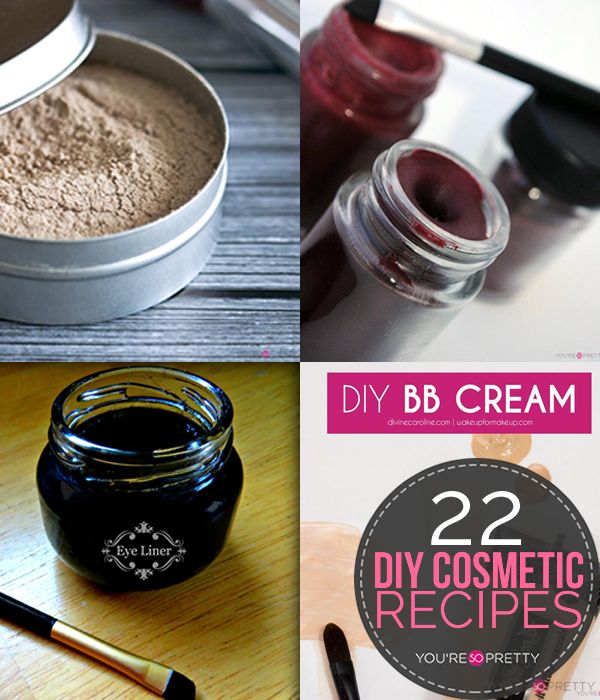
In today’s world, where sustainability and self-expression are increasingly valued, DIY makeup is experiencing a surge in popularity. Creating your own cosmetics allows you to control the ingredients, customize the shades, and reduce your environmental impact. While it might seem daunting at first, making your own makeup is a rewarding experience that opens up a world of creative possibilities. This comprehensive guide will walk you through the basics, providing you with the knowledge and confidence to embark on your DIY makeup journey.
Understanding the Basics: Ingredients and Tools
Before diving into specific recipes, it’s crucial to understand the fundamental ingredients and tools you’ll need. The beauty of DIY makeup lies in its flexibility; however, safety and quality should always be prioritized.
Key Ingredients:
- Butters: Shea butter, cocoa butter, and mango butter are excellent moisturizers and provide a creamy texture to your products. They are often used as a base in lipsticks, balms, and highlighters.
- Oils: Carrier oils like jojoba oil, sweet almond oil, and argan oil are excellent for moisturizing and conditioning the skin. They also help to emulsify ingredients and create a smooth consistency.
- Waxes: Beeswax, candelilla wax, and carnauba wax provide structure and hardness to your products, preventing them from melting or becoming too soft. They are essential for lipsticks, eyeshadows, and highlighters.
- Pigments: These are the colorants that give your makeup its vibrancy. Mica powder is a popular choice for its shimmer and variety of colors. Mineral pigments like iron oxides offer a wider range of colors, including earthy tones and vibrant hues. Always ensure your pigments are cosmetic-grade to avoid skin irritation.
- Powders: Powders like arrowroot powder, cornstarch, and kaolin clay provide texture and absorbency. They are often used in eyeshadows, blush, and setting powders.
- Preservatives: Preservatives are crucial for extending the shelf life of your DIY makeup and preventing bacterial growth. Cosgard and Optiphen are popular choices, but always research and follow the instructions carefully.
- Emulsifiers: These ingredients help to combine oil and water-based components, creating smooth and stable emulsions. Examples include polysorbate 80 and emulsifying wax.
Essential Tools:
- Double boiler or heat-safe bowl and saucepan: Used for melting and combining ingredients.
- Spatulas and spoons: For mixing and stirring ingredients.
- Measuring scales and cups: Accurate measurements are essential for consistent results.
- Containers: Choose airtight containers that are suitable for storing your makeup.
- Mortar and pestle (optional): Useful for grinding pigments and herbs.
- Sieve (optional): For ensuring a smooth and lump-free texture.
- Pipettes or droppers: For precise measurements of liquid ingredients.


DIY Makeup Recipes: A Step-by-Step Guide
Now, let’s explore some simple yet effective DIY makeup recipes. Remember to always practice good hygiene and work in a clean environment.
1. DIY Lip Balm:
- 1 tablespoon beeswax
- 1 tablespoon shea butter
- 1 tablespoon jojoba oil
- Optional: A few drops of essential oil for fragrance (e.g., peppermint, vanilla)
Instructions:
- Melt the beeswax and shea butter in a double boiler or heat-safe bowl over a saucepan of simmering water.
- Stir in the jojoba oil until everything is melted and combined.
- Remove from heat and add essential oils (if using).
- Pour the mixture into small containers and allow it to cool and solidify completely.
2. DIY Lipstick:
- 1 tablespoon beeswax
- 1 tablespoon shea butter
- 1 tablespoon castor oil
- 1 teaspoon cocoa butter
- 1-2 teaspoons of cosmetic-grade pigment (adjust to your desired shade)
Instructions:
- Melt the beeswax, shea butter, and cocoa butter in a double boiler.
- Stir in the castor oil until everything is melted and combined.
- Remove from heat and add the pigment, mixing thoroughly until the color is even.
- Pour the mixture into lipstick tubes or molds and allow it to cool and solidify.
3. DIY Eyeshadow:
- 1 tablespoon arrowroot powder
- 1 teaspoon mica powder (choose your desired color)
- ½ teaspoon cornstarch
- Optional: 1-2 drops of jojoba oil for a creamier texture
Instructions:
- In a bowl, combine the arrowroot powder, cornstarch, and mica powder.
- Mix thoroughly until the color is even.
- If desired, add jojoba oil for a creamier consistency.
- Press the mixture into small containers or pans and allow it to dry completely.
4. DIY Blush:
- 1 tablespoon arrowroot powder
- ½ teaspoon beetroot powder (for a rosy shade) or other cosmetic-grade pigments
- ½ teaspoon kaolin clay (optional, for a matte finish)
Instructions:
- Combine all ingredients in a bowl and mix thoroughly until the color is even.
- Press the mixture into a small container and allow it to dry completely.
5. DIY Highlighter:
- 1 tablespoon mica powder (choose a shimmery shade)
- 1 tablespoon shea butter
- ½ tablespoon jojoba oil
Instructions:
- Melt the shea butter in a double boiler.
- Stir in the jojoba oil until melted and combined.
- Remove from heat and gradually add the mica powder, mixing thoroughly until the desired shimmer is achieved.
- Pour the mixture into a small container and allow it to cool and solidify.
Safety Precautions and Considerations
While DIY makeup can be incredibly rewarding, it’s essential to prioritize safety and hygiene:
- Use cosmetic-grade ingredients: Non-cosmetic-grade ingredients can be harmful to your skin.
- Practice good hygiene: Wash your hands thoroughly before and after making your makeup.
- Work in a clean environment: Use clean tools and containers to avoid contamination.
- Test your products on a small patch of skin before applying them to your entire face: This will help you identify any potential allergies or reactions.
- Label your products with the ingredients and date of creation: This will help you track the shelf life of your products.
- Store your products in a cool, dark, and dry place: This will help to extend their shelf life.
- Be mindful of preservatives: Improperly preserved products can harbor bacteria and lead to skin infections. Always research and follow the instructions for any preservatives you use.
- Research thoroughly: Before embarking on any recipe, ensure you understand the properties of each ingredient and their potential interactions.
Conclusion:
DIY makeup offers a unique opportunity to personalize your beauty routine, experiment with colors and textures, and create products that align with your values. By following these guidelines and experimenting with different recipes, you can unlock a world of creative possibilities and enjoy the satisfaction of making your own beautiful, natural cosmetics. Remember, safety and research are paramount. With careful attention to detail, you can confidently embark on your journey to crafting the perfect DIY makeup collection.
Closing
With that, we hope this article has provided valuable insights into DIY Makeup: A Beginner’s Guide to Creating Your Own Cosmetics. We appreciate your interest in our content. See you in our next article!

